How to remove HP Firmware Updates
16th Aug 2022
Are you having issues using HP compatible inks? It is more than likely a firmware issue. Here's how to remove the software and enable your machine to continue to print!
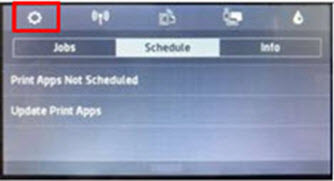
Step 1: Swipe down and then select the setup icon.
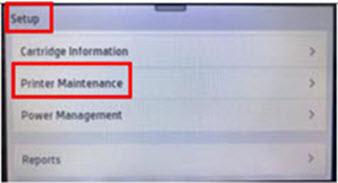
Step 2: Swipe up and then select “Printer Maintenance”
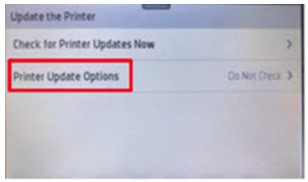
Step 3: Select ”Update the Printer"

Step 4: Touch ”Printer Update Options"
Step 5: Select ”Do Not Check"
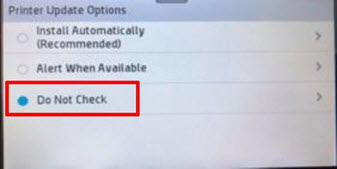
Step 6: Touch ”No" to turn off printer updates

Find more firmware tips on National Inkjets.co.uk support site
Disabling automatic HP firmware updates using the control panel on your PC
1. Open HP update option.
- Windows 10: Click Start, click All apps, click HP and click HP Update.
- Windows 8: Choose Windows + Q on your keyboard, type HP Update in the search bar and click on HP Update in the results list.
- Windows 7/Vista: Click Start, click All programmes, click HP and click HP Update.
- Windows XP: Click Start, click All programmes, click on the HP map and click HP Software Update.
- OS X: Mac uses its own software! No updates will take place via OS X.

2. Click on the Settings button. The HP Update Settings popup will appear.
3. Select Never and click on the OK button.

Close the HP Update program by clicking the cross.
Disabling automatic HP firmware updates via the HP Smart app
(Available on Android and Apple smartphones and tablets)
1. Click the printer image on the home screen.
2. Click Advanced Settings.
3. Click Tools.
4. Click Printer Updates and click Firmware Updates.
5. Select “Do not check for updates” and click Apply.
6. A popup will appear with the following question: “Do you want to turn on printer updates?”. Click No.